 Mellott's VR
SA Photonics SA-62 and Skyrim 3D
December 26th 2015
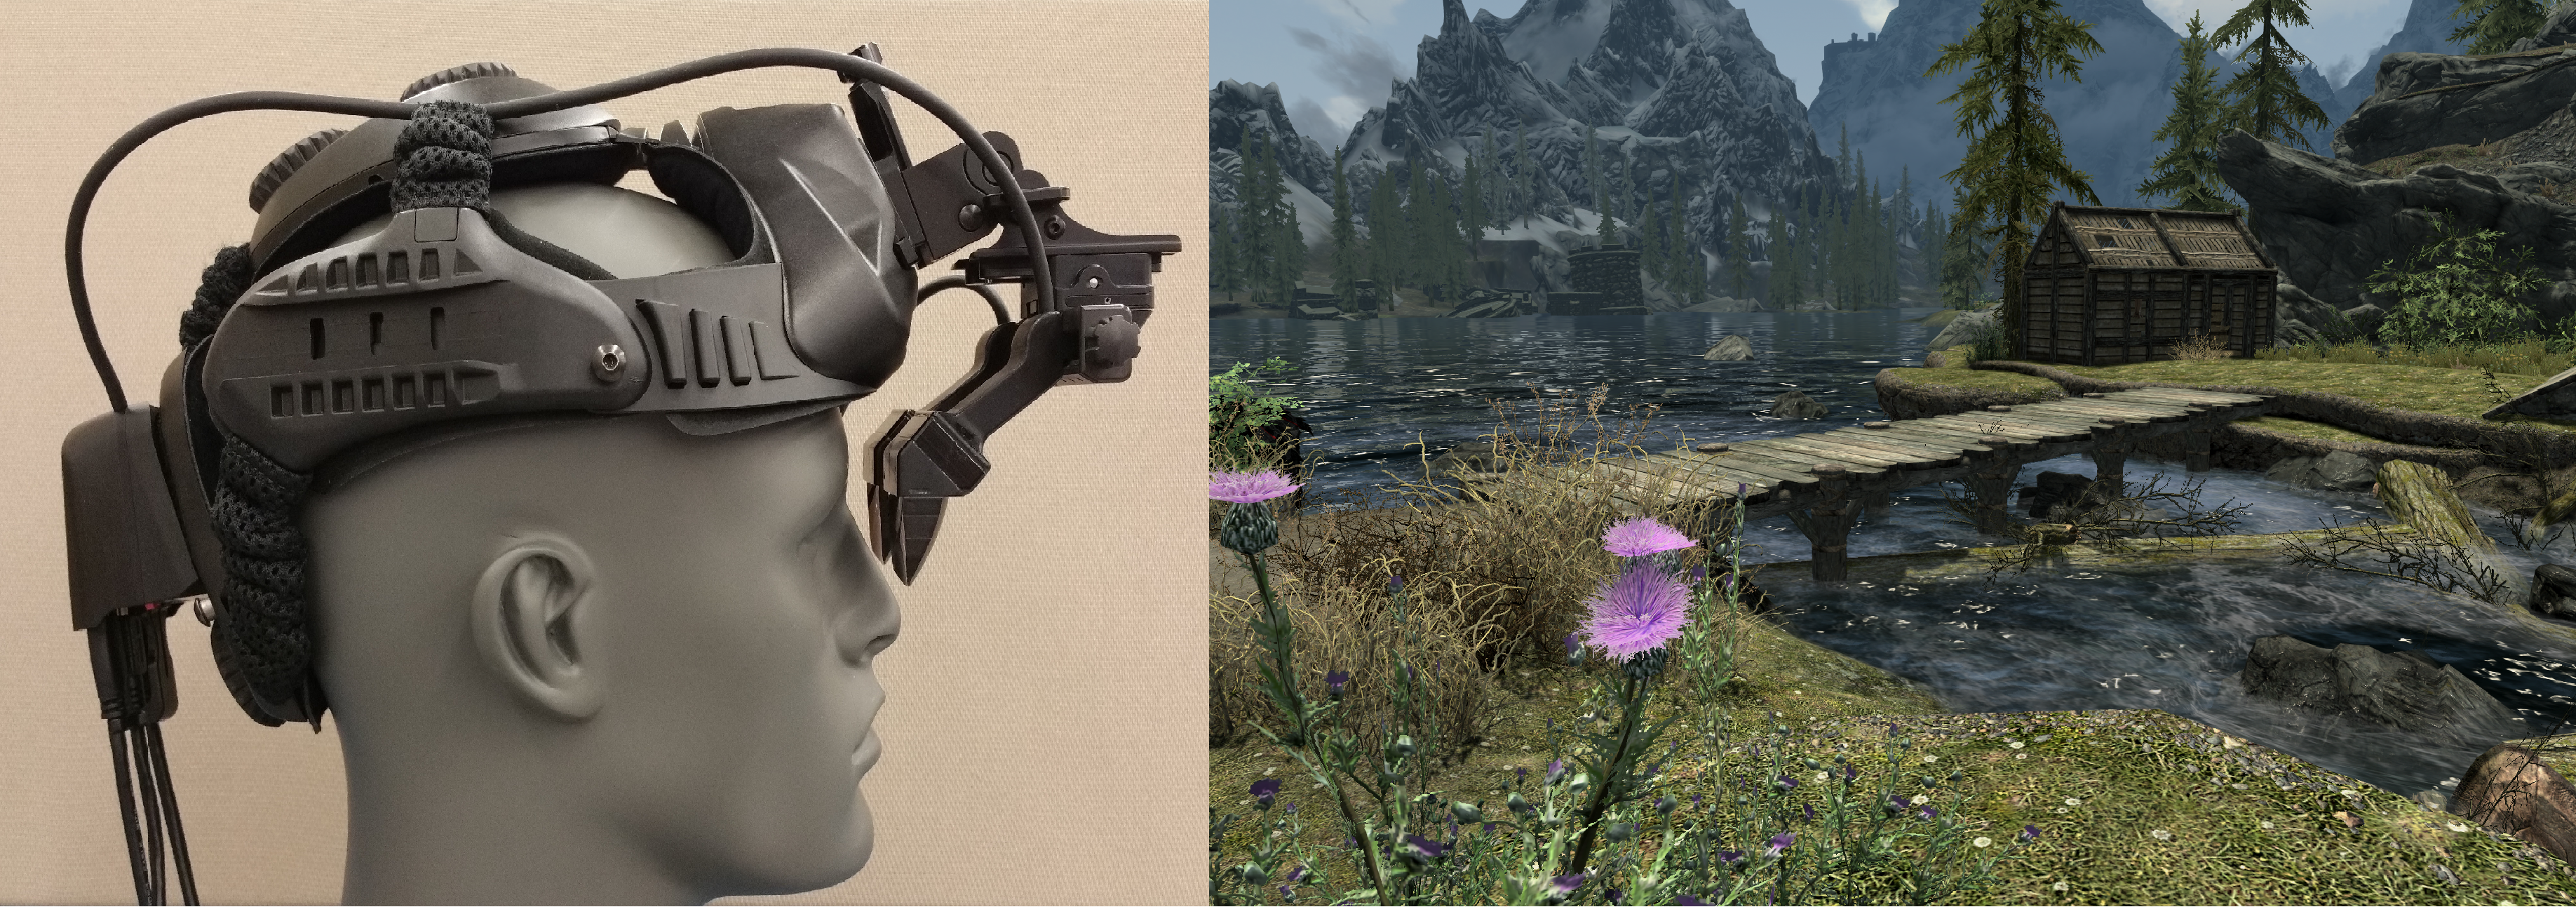
The SA Photonics SA-62 head mounted display (HMD) has dual color RGB 1920×1200 OLEDs over a 62 deg diagonal FOV (53 deg H.FOV x 33 deg V.FOV giving 1.65 arcmin/pixel). The resolution and contrast are beautiful and I wanted to use it with Skyrim. Skyrim is still probably one of the best games for VR that you can explore with an HMD and headtracking. There were several options to configure Skyrim with the SA-62. However, the SA-62 requires prewarp for the imagery out of independent left and right video channels, so getting stereo 3D from a non-native game and applying distortion correction out of 2 video challenges was a challenge. Really this is only a problem because Nvidia restricts their GeForce line of video cards from doing dual projection output, or stereo over 2 separate video channels. This capability is available on their Quadro line. Pretty lame these days but hopefully they’ll allow the GeForce line to do it soon with all the consumer VR activity that is going on. This is 2015. Applying the prewarp to the dual output video channels proved a challenge.
TriDef 3D Ignition is a popular injector program for getting stereo 3D in non-native 3D games. There is a dual projection mode under the advanced options which allows stereo 3D on the SA-62. However, without prewarp it can make you nauseous. Applying a prewarp shader was the next task and I did that via ReShade, which includes SweetFX. Writing a custom warp shader for the SA-62 and presto, you have a perfect image in the eye. I say eye because with TriDef dual projection I could only ever get it to warp the left eye. It would never apply to both eyes. I even dropped back and used a more expensive option like Immersaview Warp (Pro grade Nthuism) and it didn’t work. My next option was to somehow get SBS with prewarp going to the SA-62 and pipe each half of the SBS stereo to the appropriate eye. This would be tricky because of the dual video output. Luckily I have a ZOTAC ZT-DP2HD adapter!
After about a week of debugging and testing through several different potential configurations, I got TriDef, Reshade, Skyrim, the ZOTAC adapter, and the SA-62 working in beautiful stereo 3D. Coupled that with an Intersense InertiaCube 2 head tracker and we have pure awesomeness (I’m from Southern California). It took a lot of testing and trial and error to get everything working correctly, and I just about gave up, but it’s now working. The rest of this page explains how to set everything up. This can be used if you have an SA Photonics HMD or possibly modified to use with other HMDs with dual video and no pro-line Quadro graphics card.
To get started here are my program versions for reference: TriDef 3D Ignition 3.9.4 and TriDef 3D 6.9, ReShade Framework 1.1.0, Steam API v017, The Elder Scrolls V: Skyrim with high resolution texture pack, Dawnguard, DragonBorn, and Hearthfire add-ons. I’ve only tested with these versions. Other versions may break something. I’ll go over each piece individually below. Obviously you’ll need to install all the necessary programs. The Skyrim add-ons are optional.
TriDef 3D Ignition
The registry needs to be edited for TriDef 3D Ignition to force it to output a resolution of 3840×1200. There are options available to configure TriDef via the registry that aren’t made available in the program GUI. Applying this registry edit, along with using the warp file below via ReShade, ensures 3D stereo and the correct aspect ratio in the SA-62. The registry edits are shown below. I had a solution working without the registry edits but the aspect ratio was not correct and resulted in things being squeezed. You’ll see reference to this issue if you search on Google for the TriDef registry edit and why it was originally created.

ResOverrideLevel 0 uses in game settings, 1 tries the registry entries if possible or otherwise defaults to in game resolution, 2 forces registry entries. Thanks to Daniel at TriDef for this post. Otherwise things are more difficult and don’t look quite right. Here’s a zip with the TriDef registry edit script file. Open it and run the program. You’ll need to click OK several times to allow registry access. The reg edit program is called TriDef3D-Reset. TriDef needs to be installed prior to this.
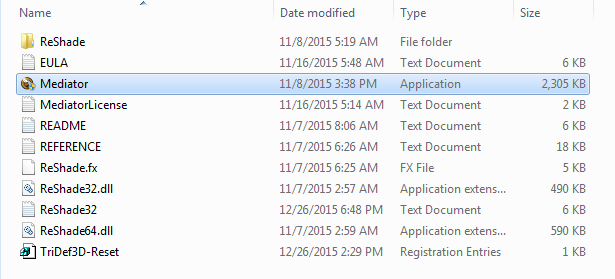
ReShade
Use this Reshade Custom_TridefSBS3840_Skyrim1920.h warp file for distortion correction and taking care of SBS to both eyes. You’ll actually need the distortion maps to load as textures as well. Those I can’t give out but you can contact SA Photonics for them. Then I rename the Custom_TridefSBS3840_Skyrim1920.h file simply to Custom.h and replace it in the Reshade CustomFX folder within the Skyrim Folder. Use the ReShade Mediator to place the files in the Skyrim folder with TESV.exe. Make sure Custom.h is enabled in your pipeline before pushing the files to the game folder. Otherwise place them manually yourself. An example file path is: C:\Program Files (x86)\Steam\SteamApps\common\Skyrim.
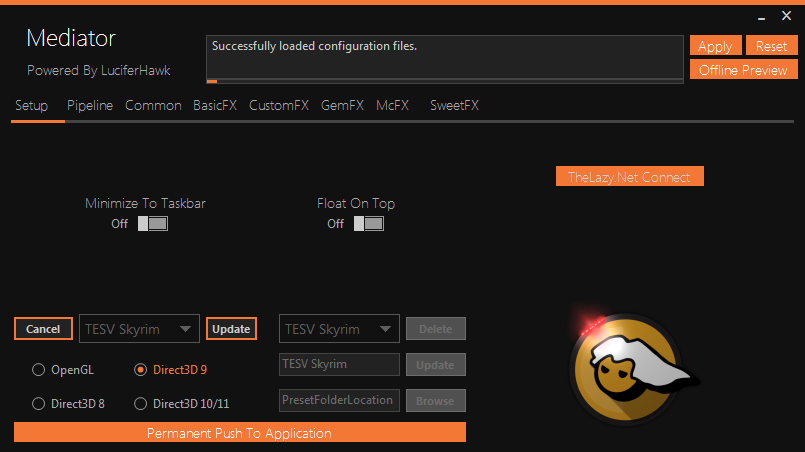
Here’s what the Mediator front panel looks like.
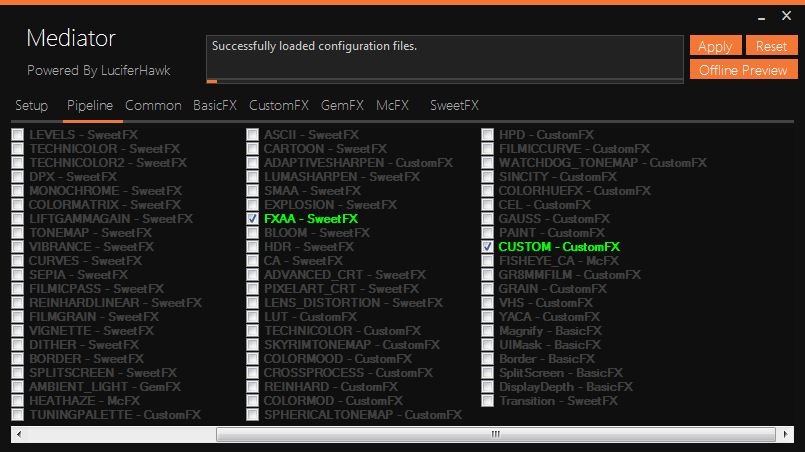
And this is the Custom.h file enabled in the pipeline. After being enabled make sure you push it to the Skyrim folder using the front panel settings and button at the bottom.
When I have some more time I’ll clean up the ReShade files so that my custom prewarp is named SA-62.h and doesn’t take the Custom.h slot. It’s only a few other files to edit.
ZOTAC Adapter
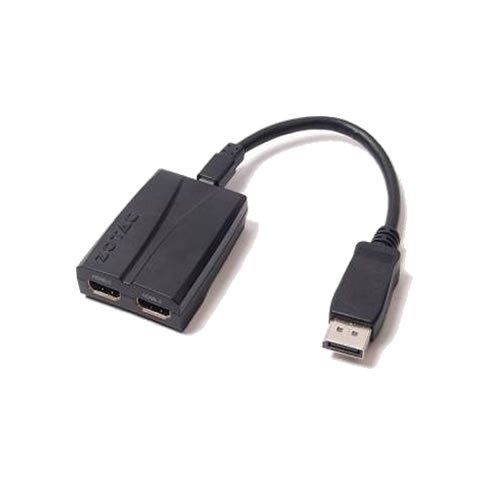
I then use a ZOTAC ZT-DP2HD adapter to drive both HDMI inputs of a SA-62 HMD using a single DisplayPort output from my graphics card. This will allow the SBS 3D output to be placed on a 3840×1200 panel which consists of my two HMD microdisplays. None of this works without this hardware adapter. You can find them online still but it’s getting tougher. Try eBay.
Skyrim
Set Skyrim to 1920×1200 resolution using the SkyrimPrefs.ini. This file is located on my Win7 machine under: Documents\my games\skyrim. The under the [DISPLAY] section set:
iSize H=1200
iSize W=1920
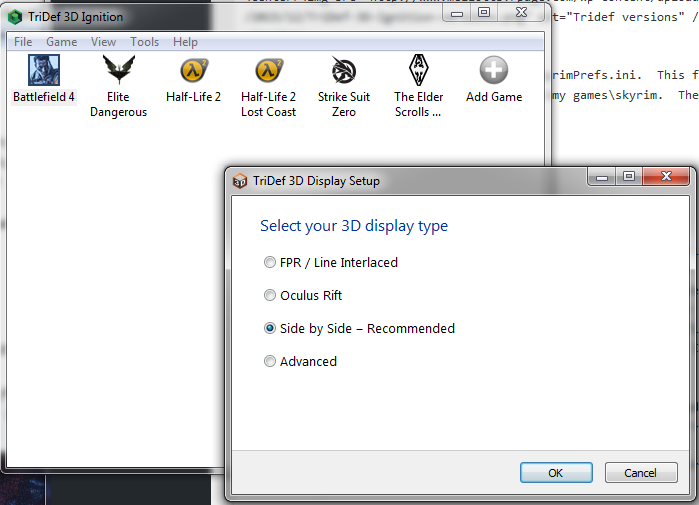
Then launch Skyrim via the TriDef 3D Ignition GUI. Make sure you’re in Side-By-Side (SBS) stereo mode. You can switch this by going into the Tools menu in TriDef 3D Ignition and then Display Settings. Select SBS and then click OK. Then launch Skyrim by double clicking the appropriate icon. My TriDef link actually launches Skyrim-Script-Extender (SKSE). It should all still work with SKSE.
Once in the game you’ll want to adjust the TriDef settings by using the numpad depending on your computer and GPU. Number pad 0 brings up the TriDef on screen menu. Numpad 5 is enter and 2, 4, 6, and 8 are the arrows keys to move around. I run dual 780Ti watercooled GPUs so I’m getting 60Hz at most settings. However, even in geometry mode stereo 3D I don’t get full 60Hz all the time at the TriDef high setting. This is also with Skyrim in high mode, NOT Ultra. It probably makes most sense to tweak Skyrim to get full frame rate at 60Hz and then play with TriDef to get that last bit. TriDef supports both full geometry 3D stereo as well as what’s called Power mode which is Z-buffer 3D. Optimizing TriDef, Skyrim, and ReShade is another set of pages that I won’t get into here. Play around with the options and you’ll get a quick understanding of what tradeoffs you need to make to maintain 60Hz. Maintaining frame rate is critical to avoid breaks in stereo and stuttering.
Head Tracker
Now get a head tracker working and you’re gold. I used an Intersense InertiaCube2 with mouse emulation at 120Hz update rate. Make sure you set the mouse emulation update rate lower than what’s actually streaming from the sensor or you’ll get stutter. It’s not perfect because Roll is missing but it’s 90% of the way there and still makes the whole setup very impressive. I like the Intersense over the HillCrest FSM-9 because I can tweak some of the filter and sensor parameters using ISDemo, especially for prediction. HillCrest has these buried in their SDK code but it’s not accessible externally for easy modification especially when using the Hillcrest example mouse emulation program.
That’s the configuration. Hopefully it helps people out or at least gives some hints to issues with other hardware configurations that may be helpful.
